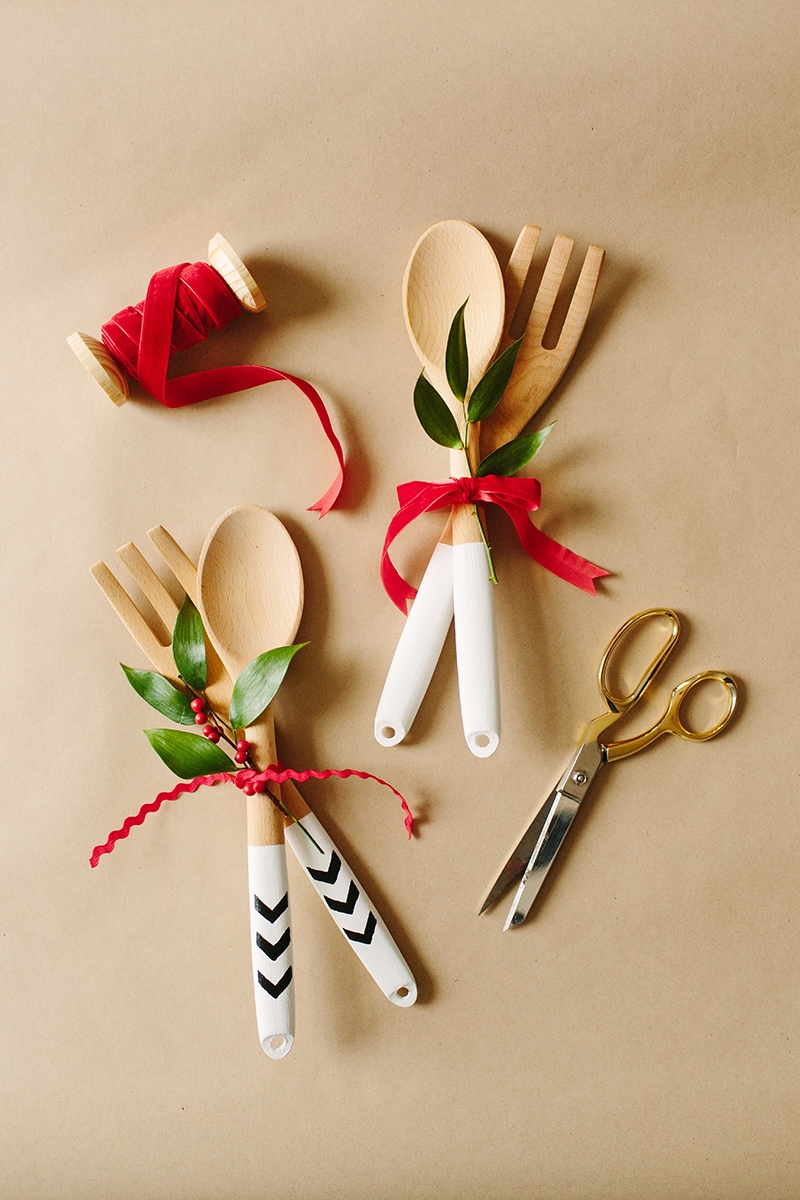
How to make paint dipped salad tongs Thanksgiving Ikea hack #1
November 16, 2016
Have you ever wanted to know how those fancy DIY girls make paint dipped salad tongs? No? ok neither did I till I saw them on an Ikea hack blog, and thought I have to make these! I love the dipped look because it has a thicker layer of paint and looks so much more professional, and the fact that there isn’t paint streaks. All in all its a much cooler look than just painting the spoons! But your a big girl you can choose which way you want to do it. 
Step 1:
Gather your materials. You will need:
- Wooden serving utensils, ours are $1.49 each from Ikea
- Paint brushes in a variety of sizes, $4.78 from Amazon
- Painters tape, $6 from Amazon (can also use masking tape or washi tape)
- Non-toxic acrylic paint, in a gallon can must be full or almost full to work
- Box, or paint can to rest utensils on while drying

Step 2:
Measure where you want the paint to end on the spoon, and use painters tape above the end point to ensure a crisp, clean line. Use the same measurement on the matching fork. Or don’t, I wanted a wavy line and kinda wanted it to look organic, but its your choice. 
Step 3:
Using white paint,dip the bottom of the spoon. Let it dry by resting utensils spoon part on top of the paint can or hang with a clamp and a dowel so that all the paint can drip off. Remove tape when completely dry.
(don’t i match my outfits so well ha ha, when I’m in DIY mode I don’t have time to look cute)
( Yes i had to stack a CapriSun box on top of the spoons so that they wouldn’t fall)
Step 4:
For a color block design, use painters tape again to section off part of the white paint. Paint using your desired color. Once dry, remove tape. Sometimes the tape pulls up some of the paint, so touch up if needed. works better with washi tape as its not as sticky. I also tried polka dots but please don’t do this as dipping is much too thick a treatment to have this work! LOL
Step 5,
If you would like to add a design use a small detail brush, carefully fill in your design. It is important that you go slowly (!) so you do not make mistakes.
I showed the stained ones on Studio 5 you might get a peek at the painted ones, but i had way too many ideas to share to get through them all! As always I’d love to see how you make this project your own Tag me so I can see and I hope you have a wonderful Thanksgiving!


