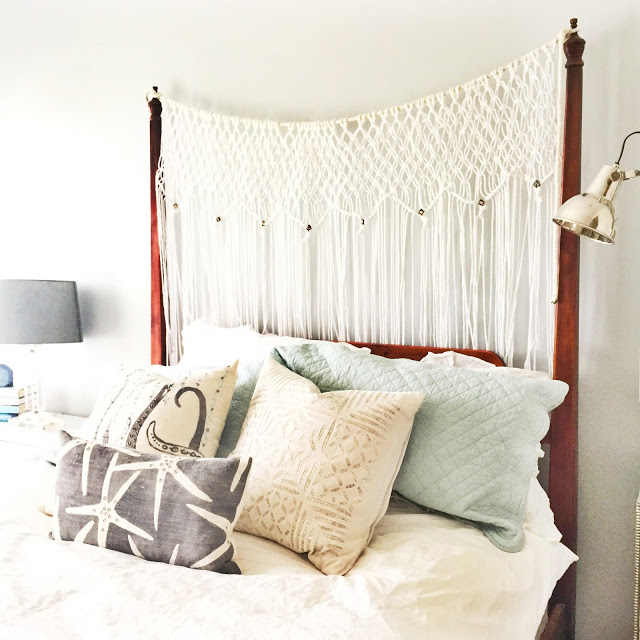
How to tie macrame knots, aka square knot for a darling wall hanging
October 19, 2015

Wall hangings and macramé knots sound kinda 70’s but I’m so loving the modern Boho chic look they create. I first fell in love with them when I was doing research for a client for her wedding. She loved the boho feel and I immediately fell for the backdrops. We didn’t end up doing this for her wedding but she did want me to make her one for her house. As you can see I’m not quite done and I needed to use it for Studio 5!! Loved the neutral colors she picked out, with just a hit of green in the weave part.

After i had made my client a wall hanging for her house I just had to make one for my house. then well it just snowballed from there, into a lot of fun and cool projects. I ended up making 4 more for friends, baby showers and a teenage room!!

Today I’m going to show you how I tied the white Macramé knots over my bed.

You are going to want to start this on a dowel You can get them from Joanns or from Amazon just click on the amazon button on the side bar and it will have the products I used.


I added some square glass beads at the bottom of the V’s just to add some bling and I loved how they caught the light against the cord. I just sewed them on with tread in the place I wanted them. The lampshade below is done the exact same way and I’ll show you how on an upcoming blogpost.

In the mean time if you want to win this mobile below just leave me a comment and follow this blog or you can go to my instagram feed at theglitzypear to enter there as well, and get extra chances. Have fun making these darling modern macramé.


Thank you for posting this awesome post. I’m a long time reader however I’ve never posted
a comment. I’ve bookmarked your website and shared this on my Twitter.
Thanks again for a quality article!
The brand is Bonnie 4mm cord 50 yards I used white ?
What do you use for the cord? Yarn?
Hello friend!! I use a nylon macrame cord I got from Amazon it was really inexpensive and I used about 5 Skeins.
Just watched your segment on Studio 5!! Your wall hangings are so so darling! Just started following you on Instagram 🙂
You are so nice thank you so much!! Good luck on the giveaway