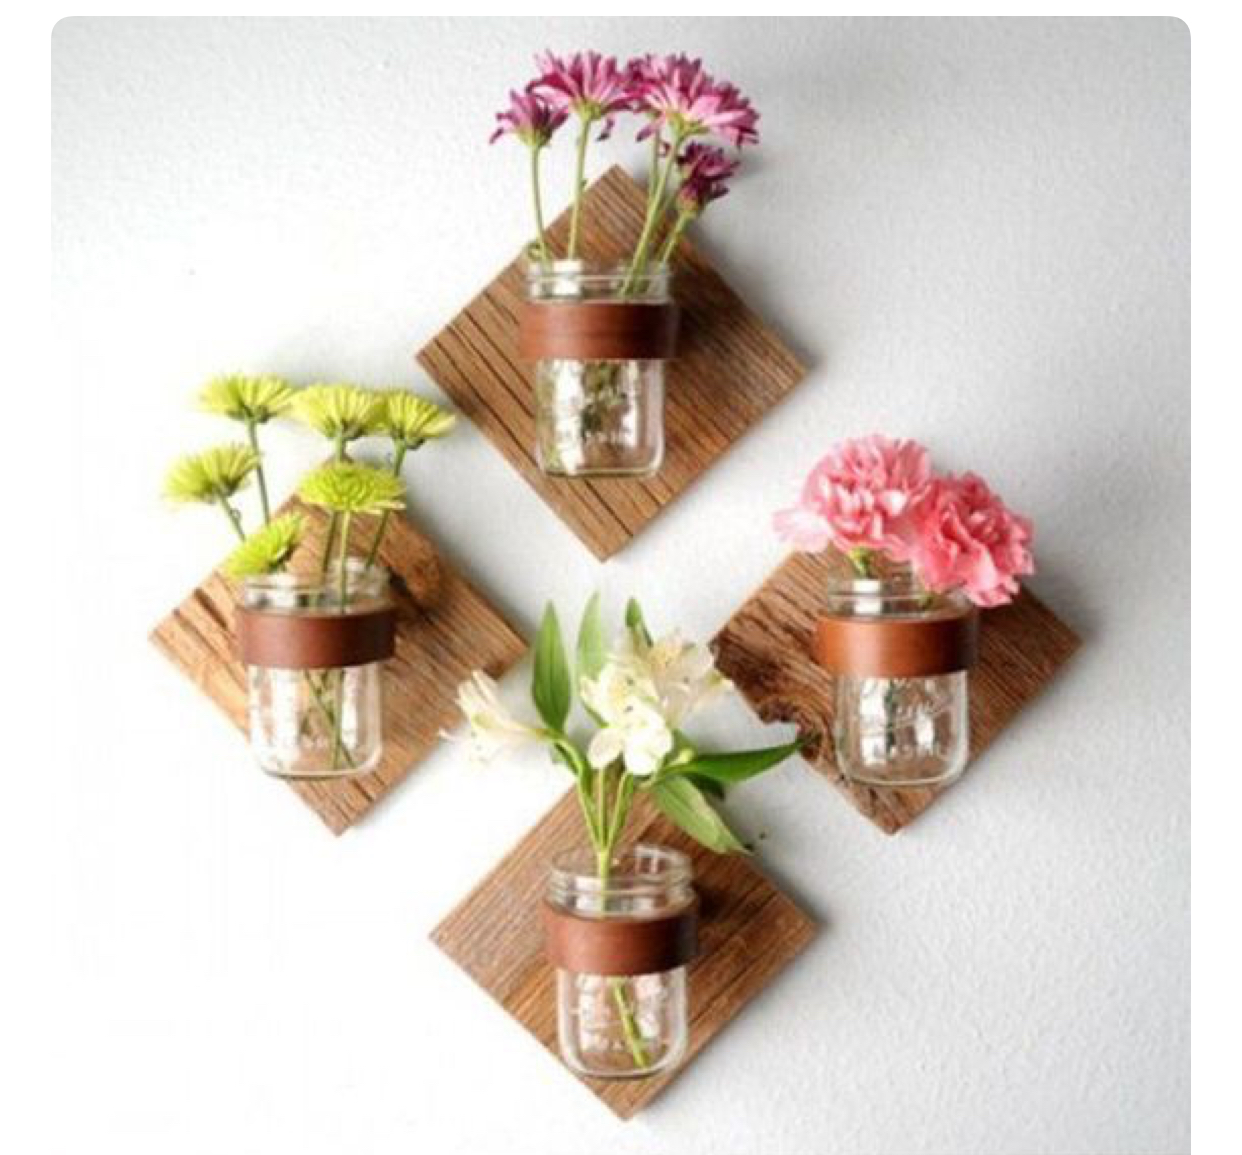
DIY farmhouse wood wall vases
August 27, 2018
How to make Farmhouse wood and Mason jar wall vases.
When I was asked to make some darling modern decorative bud vases I didn’t have to think very hard. There a ton of inspiring photos on Pinterest and the one above is one of my favorites. If you have been to the blog this summer you have seen a few more tutorials on making your own modern decor, using bud vases. Modern DIY bud vase centerpieces and DIY copper bud vases I think I went a bit crazy but its so easy why not and with the upcoming holiday season these just might be the fresh kick your house needs So here’s what you need to make these farmhouse wood wall vases.
What you need
- 8 inch, pine boards I got mine from Home Depot and had them cut them every 8 inches to get that cute square
- adjustable hose clamp Home depot or I got mine from Amazon
- gold spray paint
- gold screws
- mason jars I like the wide mouth ones
- gold eye hooks to hang, you could do all this with silver too.

Step one
Get your wood and have it cut at the Hardwear store. I’m lucky enough to have a hubby and a miter saw but the guys at the store have cut loads of stuff for me. After your squares are cut sand, sand, sand so that the edges are nice and smooth. This will make the stain go on much nicer. 

step two
Stain your pieces of boards whatever color you want I did my squares dark but I also make one and used white stain. They both looked amazing so it just depends on where your farmhouse wood wall vases are going. 

Step three
I loved the look of my inspiration photo up top with the leather wrapped around the mason jar, but I was wanting it to be more industrial and kinda farmhouse instead of boho. So I thought I’d use my dryer vent clamps lol They worked perfectly and were super cheap to buy. After staining my wood I thought about using a little spray paint to make the rings gold and loved it sooooo much better. If you are going to spray your clamps remember that the spray paint won’t cover the part that is clamped shut. so I opened them up and sprayed. The problem with that was when I started twisting the clamp shut over the mason jar it was getting all scratched up. So here’s the tip. Spray them at the size they are going to be when you put the jars in and when they dry open them up a bit and spay the underside part. That way you are just spaying a tinny part and not opening and closing the clamp too many times. 
Step four
drill a pilot hole in the center of the board so that the metal ring will be easier to adhere. 
Step five
I had to hammer in a small nail so that I could get the drill to go through all the things. However my hubby did not need any of these steps so just take note on how strong your hands are, and if you access to a nice husband, dad, or brother. LOL 

Step six
Line up all the holes and drill away! I kept my ring closed and it was tricky for a min but I didn’t want to scratch the paint job. 

Step seven
I could not figure out how to get the eye hook into the top of the wood and ruined a piece of wood trying to drill into the top. I finally had the idea to use a small saw and just start a space for the eye hook to go into my cute farmhouse wood vase. I wanted to hang them on the diamond so this was tricky. You could just put a picture hanger on the back of the wood vase as well but it just didn’t have that extra cool factor. I’m all about making things more amazing with great little details. I mean if you are going to all this work you might as well make these cute little farmhouse wood wall vases as cute as possible. 

Step Eight
Scerw in that little eye hook! I know I know its so much cuter right? ok, my friend, you are done all you have left is to tighten your mason jars into the adjustable hose clamp and add flowers I just love the farmhouse feel it gives off. Don’t judge me but I haven’t’ gotten around to actually hanging my farmhouse wood wall vases in my house yet. I’ve been so busy this summer with weddings and organizing clients things have just gotten away from me this summer. But you better believe that Ill be hanging these sweet little farmhouse wood vases for fall, can you just see them brimming with sunflowers and itty bitty pumpkins?


